
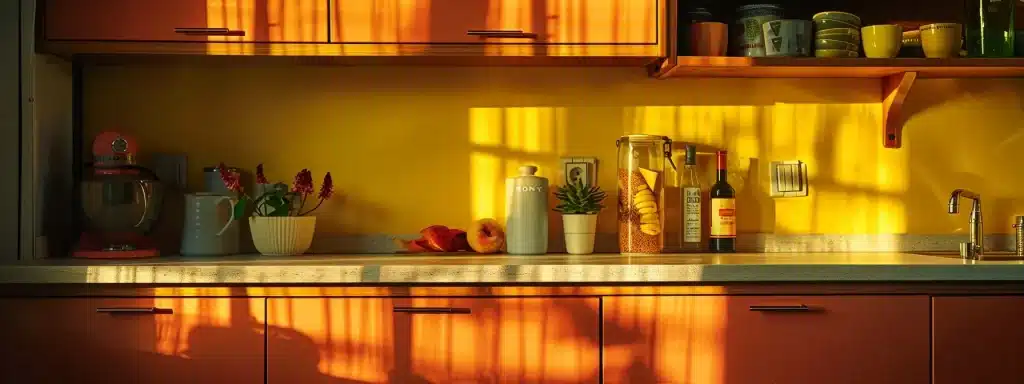
Affordable Kitchen Cabinet Renovation Ideas
Are your kitchen cabinets looking dated but you’re worried about cabinet refacing costs? You’re not alone. Many homeowners want to enhance the beauty of their kitchens without breaking the bank. In this post, I’ll share several affordable kitchen cabinet renovation ideas, such as using adhesive peel-and-stick surfaces, upgrading handles, and incorporating open shelving. By the end, you’ll have practical solutions to refresh your kitchen’s look without the hefty price tag, helping you create a space you love.
Key Takeaways
- Choose high-quality, budget-friendly paint for durable and easy-to-clean kitchen cabinets
- Preparing and cleaning cabinets is crucial for optimal paint adhesion and finish
- Upgrading handles and knobs can enhance the kitchen’s overall aesthetic without significant costs
- Incorporating adhesive veneers offers an affordable way to refresh cabinets effectively
- Adding crown molding and under-cabinet lighting can elevate your kitchen’s look on a budget
Revitalize Cabinets With a Fresh Coat of Paint

Choosing budget-friendly paint options can significantly transform your kitchen cabinets during a renovation. I’ll walk you through preparing cabinets for painting on a budget, ensuring your refacing cabinets project is hassle-free. Discover techniques for a smooth, durable finish and the importance of adding protective sealants for longevity. Let’s dive into these essential steps to achieve stunning results.
Selecting Budget-Friendly Paint Options
Selecting the right paint is crucial for a successful kitchen cabinet refacing project on a budget. I often recommend using high-quality, budget-friendly options like acrylic or latex paint, which are both durable and easy to clean, standing up to the wear and tear of everyday kitchen use, especially around areas like the cooktop. By focusing on these inexpensive kitchen remodel choices, you can achieve a fresh and updated look for your cabinets without overspending.
| Paint Type | Durability | Best Use |
|---|---|---|
| Acrylic | High | Cabinets with moderate wear and tear |
| Latex | Medium | Non-cooktop areas |
| Enamel | Very High | Heavy-duty cabinets |
Preparing Cabinets for Painting on a Budget
Preparing your cabinets for painting is an essential step in achieving a fresh look without the high costs associated with replacing cabinets. I recommend beginning by removing all hardware and cleaning the surfaces thoroughly to eliminate grease and grime that can affect paint adhesion. It’s also wise to patch any holes or imperfections, which can minimize cabinet refacing costs and enhance the overall finish of your kitchen renovations.
Techniques for a Smooth and Durable Finish
For a smooth and durable finish on your kitchen cabinets, it’s important to approach the painting process with care and precision. I always recommend starting with high-quality brushes or foam rollers, which can help eliminate brush strokes and ensure an even application across your pantry doors and drawer fronts. Additionally, investing time in sanding and priming can significantly reduce the complexity of achieving a professional look, making your kitchen remodel not only visually appealing but also lasting for years to come:
- Start with proper cleaning and sanding to ensure surface readiness.
- Use primer to enhance paint adherence and durability.
- Apply the paint in thin, even layers, allowing each coat to dry thoroughly.
- Finish with a protective sealant for added longevity.
Adding Protective Sealants for Longevity
To ensure longevity for your newly painted kitchen cabinets, I always recommend applying a protective sealant. This step is crucial, as it safeguards the paint against scratches, moisture, and everyday wear and tear, especially in areas like the kitchen and bathroom. Choosing a quality sealant can also enhance the durability of surfaces made from wood veneer or other materials, providing you with confidence that your efforts in carpentry and renovation will be protected. Plus, many sealants come with warranties, adding extra peace of mind for homeowners looking to invest wisely in their cabinets.
Upgrade Handles and Knobs for an Instant Facelift

Upgrade Handles and Knobs for an Instant Facelift
Choosing affordable hardware styles for your cabinetry can significantly impact the overall look of your kitchen without adding much expense. I’ll share tips on installing new handles and knobs yourself, exploring ways to mix and match hardware for a unique appeal. Also, I’ll highlight sources for discounted cabinet hardware to help you save while refacing kitchen cabinets and updating your space.
Choosing Affordable Hardware Styles
When considering affordable hardware styles for your kitchen cabinets, I often find that even small details can make a significant difference in the overall finish. Selecting knobs and handles that complement your cabinets’ color or stain can elevate the look without the need for costly cabinet replacement. For instance, opting for modern brushed nickel or matte black finishes can pair beautifully with traditional wood tones or contemporary tile backsplashes, providing a unique appeal that impresses customers without breaking the bank.
Installing New Handles and Knobs Yourself
Installing new handles and knobs on your kitchen cabinet is a straightforward do-it-yourself project that can dramatically enhance the overall look of your room. With just a few tools and a little time, I’ve found that replacing outdated hardware can transform basic particle board cabinets into a stylish focal point. Make sure to measure the existing placements before choosing new styles to ensure a proper fit, allowing you to confidently tackle this affordable kitchen cabinet makeover with ease.
Mixing and Matching Hardware for Unique Appeal
Mixing and matching hardware for your kitchen cabinets can create a unique appeal that truly enhances your space without the need for expensive renovations. For instance, pairing a sleek brushed nickel handle with walnut knobs not only adds visual interest but also complements the warm tones of wood cabinetry and the kitchen floor. This thoughtful blend can serve as a stylish replacement for outdated hardware, making your kitchen reno feel tailored and intentional, all while keeping the project budget-friendly.
Sources for Discounted Cabinet Hardware
To find discounted cabinet hardware, I’ve often turned to online retailers and local home improvement stores that focus on sustainability. Many offer environmentally friendly options, allowing me to choose handles and knobs that not only fit my budget but also align with good interior design practices. I recommend checking out specialty websites for RTA cabinets, where you can discover a variety of stylish hardware at competitive prices without compromising on quality.
Apply Peel-and-Stick Surfaces for a Quick Transformation

Adhesive veneers and films offer an affordable solution for a kitchen cabinet renovation, providing a fresh appearance that complements features like your sink and stove. I’ll guide you through a step-by-step application process to ensure a successful transformation, along with tips on maintaining and cleaning peel-and-stick surfaces. Additionally, I’ll cover how to remove these materials without damaging your cabinets for a seamless full renovation experience.
Benefits of Adhesive Veneers and Films
Using adhesive veneers and films for refacing kitchen cabinets presents a practical and budget-friendly solution for homeowners looking to refresh their space. Not only do these materials mimic the appearance of more expensive wood options like oak, but they also simplify the kitchen renovation process. I’ve found that they adhere easily to cabinet doors, minimizing installation time and mess while providing a new look that enhances the overall home improvement experience.
Step-by-Step Application Guide
To start your kitchen cabinet makeover with peel-and-stick surfaces, first, I recommend measuring the cabinet doors and surfaces to ensure you purchase enough material for your remodel. Next, clean the surfaces thoroughly to remove any grease or dirt that could affect adhesion. As I apply the adhesive veneers, I focus on aligning them properly, smoothing out any air bubbles to avoid peeling later. Take your time during this process; a careful application not only looks better but also provides a higher return on investment. Once everything is in place, finishing touches like enhancing your lighting around the cabinets can truly amplify the new look, making your space feel more inviting—not to mention, it can cleverly update the area around the dishwasher and sink without the need for replacing your entire cabinetry.
Maintaining and Cleaning Peel-and-Stick Surfaces
Maintaining and cleaning peel-and-stick surfaces is straightforward and essential for ensuring their longevity. I recommend using a mild soap solution and a soft cloth, as abrasive cleaners can damage the adhesive backing and compromise the look of your cabinet refacing project. Keeping surfaces clean not only maintains their aesthetic appeal, especially when paired with brass hardware, but also enhances accessibility, allowing you to easily reach and enjoy your newly renovated kitchen space. For the best results, make routine cleaning a part of your maintenance to sustain the fresh feel of your Kitchen Remodeling Services over time.
Removing Adhesive Materials Without Damage
When it’s time to remove adhesive materials from your cabinets, I’ve found that a careful approach is key to avoiding damage. Start by gently peeling the edges away from the surface, using a plastic scraper if needed to help lift the material without scratching the cabinets. If residue remains, I recommend applying a little heat from a hairdryer to loosen the adhesive, making it easier to clean without harming the finish. This method not only protects your cabinets but also ensures a smooth transition for any future renovations.
Reface Cabinets Instead of Replacing Them

Reface Cabinets Instead of Replacing Them
Understanding the cabinet refacing process can offer an affordable alternative to complete replacements, maximizing both your budget and aesthetics. I’ll share DIY tips to help you cut costs, compare various refacing materials and their costs, and highlight when it might be best to seek professional assistance. This information will guide you through a successful kitchen cabinet renovation.
Understanding the Refacing Process
Understanding the cabinet refacing process is essential for homeowners looking to achieve an updated look without the hefty price tag of a full replacement. Refacing involves replacing the cabinet doors and drawer fronts while keeping the existing cabinet frames intact, which can save both money and time in your kitchen renovation. This approach allows for a fresh aesthetic that aligns with your personal style, making it a practical solution for any budget-conscious kitchen project.
| Refacing Component | Description | Benefits |
|---|---|---|
| Cabinet Doors | Swap out old doors for new ones that fit your desired style. | Instantly refreshes the kitchen’s appearance. |
| Drawer Fronts | Replace or repaint drawer fronts to match your new design. | Enhances functionality while enhancing aesthetics. |
| Hardware | Add new handles and knobs to elevate the overall look. | Provides a modern touch at a low cost. |
DIY Refacing Tips to Cut Costs
To cut costs during a cabinet refacing project, I suggest focusing on DIY strategies that make a big impact. For instance, refinishing your existing cabinet doors can often yield stunning results without the need for new materials. Additionally, sourcing second-hand cabinet doors or finishing touches from local reuse centers can not only save you money but also add unique character to your kitchen. By integrating these practical approaches, you can achieve a beautiful kitchen look that fits your budget and meets your style preferences.
Comparing Refacing Materials and Their Costs
When comparing refacing materials and their costs, I often find that laminated surfaces offer a cost-effective solution, ranging from $1 to $3 per square foot, while solid wood veneers can run from $4 to $8 per square foot. In my experience, choosing laminated options can provide a fresh look without excessive spending, especially for kitchen cabinets that endure daily wear. Always keep in mind your specific kitchen needs, as investing in slightly more durable materials might save money in the long run due to reduced maintenance and replacement costs.
When to Consider Professional Assistance
Considering professional assistance for your cabinet refacing project can be beneficial when the scope of work becomes overwhelming or if you’re unsure about the steps involved. I’ve frequently seen homeowners achieve better results by hiring experts, particularly when structural issues are present or when high-end materials are being used. If your kitchen remodel involves complex designs or if you simply want to ensure a seamless finish, seeking professional help might be the right choice for achieving that stunning transformation.
| Considerations for Professional Help | Description | Benefits |
|---|---|---|
| Complex Structural Issues | When cabinets are damaged or misaligned. | Ensures safety and proper installation. |
| High-End Finishes | Using expensive materials that require expertise. | Maximizes quality and longevity of the renovation. |
| Time Constraints | When you have a limited timeframe for the project. | Speeds up the renovation process, allowing for a quicker response to your needs. |
Incorporate Open Shelving for a Modern Look

Incorporating open shelving in your kitchen can provide a modern look while enhancing functionality. I’ll guide you on how to remove cabinet doors safely, style open shelves affordably, and organize items for visual appeal. We’ll also explore how to combine open shelves with closed cabinets for a balanced design, ensuring your renovation project remains stylish and cost-effective.
Removing Cabinet Doors Safely
When I guide homeowners through the process of incorporating open shelving, I emphasize the importance of removing cabinet doors safely to avoid damage. Begin by emptying the cabinets and then use a screwdriver to detach the hinges carefully—place screws in a safe spot for reassembly later. If needed, apply painter’s tape around the edges to protect the surrounding surfaces from scratches, ensuring your kitchen cabinet renovation remains neat and professional:
- Empty the cabinets completely.
- Carefully detach the hinges using a screwdriver.
- Store screws safely for future use.
- Use painter’s tape to protect surfaces from scratches.
Styling Open Shelves Affordably
Styling open shelves affordably can truly elevate the aesthetic of your kitchen without breaking the bank. I often recommend using decorative dishes, colorful jars, and plants to create visual interest while keeping functionality in mind. These simple additions can add character and charm to your space, making it both inviting and stylish:
- Use decorative dishes and glassware for a cohesive look.
- Incorporate colorful jars for effective storage and style.
- Add small plants or herbs to bring a touch of nature indoors.
- Mix and match items to create an eclectic, personalized display.
Organizing Items for Visual Appeal
When organizing items for visual appeal on open shelves, I recommend using a mix of decorative and functional pieces to create an inviting atmosphere in your kitchen. For instance, I often incorporate colorful jars, stylish dishes, and lush plants to add warmth and personality to the space, while also keeping essential items within reach. Balancing aesthetics with practicality not only enhances the overall look but also makes your kitchen more functional, allowing you to enjoy the beauty of open shelving without sacrificing convenience.
Combining Open Shelves With Closed Cabinets
Combining open shelves with closed cabinets allows for a balanced look that enhances both aesthetics and functionality in your kitchen. I often recommend keeping everyday items within easy reach on open shelves while using closed cabinets to store less frequently used or more visually cluttered items. This arrangement not only provides convenience but also creates visual interest, allowing you to showcase beautiful dishware or decorative pieces alongside practical storage solutions for a more organized kitchen environment:
- Maximize storage by placing closed cabinets at the top for bulky items.
- Add open shelves below to display decorative bowls or cookbooks.
- Create a flow by coordinating the styles and finishes of both elements.
- Incorporate lighting above or below the shelves to highlight your display.
Add Decorative Elements for Personalized Touches

Enhancing the look of your kitchen cabinets can be achieved through several affordable decorative elements. I’ll cover simple yet effective options, such as installing crown molding to add elegance, using glass inserts to elevate design, painting cabinet interiors for a pop of contrast, and adding budget-friendly under-cabinet lighting that enhances functionality. Let’s explore how these upgrades can personalize your space without incurring high costs.
Installing Affordable Crown Molding
Installing affordable crown molding can significantly enhance the overall aesthetic of your kitchen cabinets. I’ve seen how this simple addition can transform a standard look into something more elegant and sophisticated, making your cabinets stand out without the hefty price tag. You don’t need to be a professional carpenter to install crown molding; with the right tools and a little patience, I recommend measuring carefully, cutting at the correct angles, and securing the molding to the top of your cabinets for an impressive finish:
- Choose a style that complements your kitchen design.
- Measure and cut the molding carefully for an exact fit.
- Use a nail gun or adhesive for easy installation.
- Finish with paint or stain to match your cabinets.
Using Glass Inserts to Elevate Design
Incorporating glass inserts into your kitchen cabinet doors is a fantastic way to elevate the design without breaking the bank. I often suggest this upgrade when homeowners want to showcase beautiful dishware or decorative items while still maintaining some storage functionality. By replacing solid cabinet doors with glass inserts, you not only add visual interest to your space but also create a sense of openness, making your kitchen feel larger and more inviting. This simple change can really enhance the overall aesthetic of your kitchen without the costs associated with a full remodel.
Painting Cabinet Interiors for Contrast
Painting the interiors of your kitchen cabinets is a simple yet effective way to add contrast and personality to your space. I’ve experienced how a bold color on the inside can beautifully frame dishware or decorative items, creating a striking visual appeal that sets your kitchen apart. Choosing colors that complement your cabinet exteriors, such as teal paired with white or deep gray against light wood, can elevate the overall aesthetic while staying budget-friendly.
| Color Pairing | Effect |
|---|---|
| Teal and White | Creates a vibrant, coastal feel. |
| Deep Gray and Light Wood | Offers a modern and sophisticated look. |
| Soft Blue and Cream | Adds a calming aesthetic perfect for open kitchens. |
Adding Under-Cabinet Lighting on a Budget
Adding under-cabinet lighting is a simple yet impactful way to upgrade your kitchen without a hefty price tag. I often recommend LED strip lights or puck lights that can easily be installed on a budget, offering both functionality and a modern aesthetic. These lights enhance visibility in work areas while adding ambience, ultimately making your kitchen feel more inviting and organized:
- Choose affordable LED strip lights or puck lights.
- Ensure easy installation to save on professional costs.
- Enjoy improved visibility and a welcoming atmosphere.
Conclusion
Affordable kitchen cabinet renovation ideas empower homeowners to transform their spaces without significant financial strain. By utilizing techniques like painting, upgrading hardware, and incorporating open shelving, you can achieve a fresh, modern look while maximizing your budget. Furthermore, understanding the cabinet refacing process allows you to refresh your kitchen’s aesthetic and functionality efficiently. Embrace these creative solutions to make a lasting impact on your kitchen renovation journey.
- Master Countertop Maintenance With These Key Tips - June 10, 2025
- Expert Tips for Estimating Custom Home Building Expenses - June 6, 2025
- Guide to Crafting Budget-Conscious Custom Home Designs - June 3, 2025