Author name: Alex Azra

Another second-generation builder, Alex grew up in Houston, Texas, with a family in construction and real estate. He graduated from Texas State University in 2016 with a clear vision and drive to break into remodeling and investing. Before joining the Catalyst team, Alex was a Residential Construction Project Manager for many years, and he also has investment experience - flipping foreclosures and residential homes. His hobbies include real estate, hiking, traveling, developing new skills, and spending time with family and friends.

a modern, eco-friendly home in Austin showcases sleek, sustainable architecture with solar panels, large windows, and a minimalist design, set against a vibrant urban skyline.

Sustainable Home Designs Enhancing Austin’s Lifestyle

Across Austin, homeowners are reimagining what it means to live sustainably. Energy conservation, clean indoor air, and a reduced carbon footprint are no longer luxury features, they’re becoming the standard in modern home building. As the demand for eco-friendly custom homes rises, the best home builders in Austin are leading the way by blending cutting-edge technologies with thoughtful, locally inspired design. From solar-powered rooftops in South Austin to water-efficient landscapes in the Hill Country, sustainable homes are transforming the city’s residential landscape. This article explores how Austin’s top builders are reshaping modern living with smart design, renewable energy, and eco-friendly materials — all while enhancing comfort, cutting utility costs, and building a greener future for the community. Austin Eco-Friendly Home Innovations Austin is quickly becoming a leader in the sustainable housing movement as innovative eco-friendly home designs push the boundaries of green construction.  Focus on Passive Cooling Techniques Passive cooling is one of the most effective methods to reduce reliance on air conditioning systems, which are significant contributors to energy consumption and greenhouse gas emissions. In Austin’s warm climate, designing homes that naturally ventilate and dissipate heat can result in substantial energy savings. Techniques such as strategic window placement, cross-ventilation, roof overhangs, and the utilization of high-albedo materials reflect sunlight and reduce indoor temperatures. For instance, research published by the Energy and Buildings journal (2018) revealed that buildings using passive cooling techniques can achieve up to a 30% reduction in interior temperatures during peak hours compared to conventional designs. As a builder, I have successfully incorporated window awnings and deep eaves into many custom homes to optimize airflow and minimize solar heat gain without sacrificing architectural beauty. These design choices not only improve indoor air quality by reducing reliance on fossil fuel–powered air conditioning, but they also preserve the overall integrity of the home structure. Homeowners often experience fewer temperature spikes, a reduction in mold growth, and enhanced comfort levels. Additionally, passive cooling reduces the need for mechanical systems, thus lowering maintenance costs and electrical bills. Integration of Renewable Energy Options Integrating renewable energy sources into home designs is critical for reducing the overall carbon footprint. In Austin, solar power installations have become commonplace as modern homes incorporate photovoltaic panels into their roofing systems without compromising design aesthetics. Many new custom homes in Austin are built with the infrastructure to support geothermal systems and heat pumps, which utilize the stable temperatures beneath the ground to provide heating and cooling efficiently year-round. According to a 2020 study from the International Journal of Energy Research, homes incorporating geothermal energy systems can experience a reduction in energy consumption by nearly 40% compared to traditional HVAC systems. Incorporation of renewable options is not limited to energy production; many homes now include battery storage systems to harness excess energy generated during the day while reducing reliance on the grid during peak hours. This is especially significant as it relates to reducing energy consumption and mitigating the effects of climate change by decreasing dependence on fossil fuels. Homeowners appreciate the long-term savings and enhanced energy security these systems provide, and cities like Austin are incentivizing renewable installations through tax credits and rebates—further accelerating the adoption of sustainable home designs. Use of Locally Sourced Materials Using locally sourced materials is an essential aspect of sustainable construction since it minimizes transportation emissions, supports the local economy, and reduces the overall carbon footprint of a building. In the Greater Austin region, many home builders are turning to regionally available materials such as reclaimed wood, locally quarried stone, and sustainably harvested bamboo. These materials are not only environmentally friendly but also add a unique, earthy aesthetic that resonates strongly with Austin’s artistic and eclectic spirit. Incorporating reclaimed wood and recycled metal not only decreases the demand for virgin resources but also supports a circular economy where materials are reused and repurposed. A study by the Journal of Cleaner Production (2019) noted that using recycled construction materials could reduce the lifecycle carbon footprint of a building by up to 25%. This research reinforces the notion that with high-quality, locally sourced materials, we not only contribute to regional economic growth but also lower the energy consumption associated with transporting heavy materials over long distances. Sustainable Landscaping for Water Efficiency Sustainable landscaping is another key innovation transforming Austin homes by ensuring that water conservation measures are implemented right from the ground up. Native plant species that require less irrigation, the installation of rainwater harvesting systems, and permeable pavements are among the design strategies used to create an eco-friendly outdoor environment. By preserving water consumption, these landscaping designs help mitigate the effects of drought, which is a recurring concern in Texas. In practical terms, sustainable landscapes reduce the need for chemical fertilizers and pesticides, thereby promoting better indoor air quality as well. Permeable surfaces allow water to trickle into the soil slowly, reducing stormwater runoff and the strain on municipal sewage systems during heavy rains. Homeowners benefit from lower water bills and a resilient landscape that thrives in the local climate. Many projects in Austin now feature smart irrigation systems that adjust watering schedules based on real-time weather data. These measures ensure that every drop of water is used efficiently while contributing to the overall sustainability trend that defines modern Austin home innovations. Modern Energy-Efficient Home Designs in Austin Modern energy-efficient home designs in Austin represent a holistic approach to reducing energy consumption and optimizing indoor environments. These designs incorporate advanced smart home automation, improved insulation, state-of-the-art window technologies, and optimized HVAC systems. Collectively, these elements work to create a home that is not only energy efficient but also significantly lowers its greenhouse gas emissions and carbon footprint. Smart Home Systems for Efficient Energy Use Smart home systems have revolutionized how energy is managed in modern homes. In Austin, custom homes equipped with smart thermostats, energy-monitoring sensors, and automated lighting systems help homeowners control and reduce energy usage in real time. Smart home technology integrates seamlessly with other renewable energy technologies like solar panels and battery storage. This integration allows for precise control over heating and cooling and maximizes energy efficiency across the board. For example, a study by the U.S. Department of Energy in 2021 indicated that homes with smart energy systems can cut energy consumption by up to 20%. In these systems, sensors automatically adjust indoor lighting and temperature based on occupancy and time of day. This not only saves electricity but also enhances the comfort of the indoor environment. As I’ve observed in many projects, the installation of smart home systems leads to well-monitored energy consumption patterns, where minor behavioral adjustments by residents multiply into significant energy savings over time. Furthermore, smart home systems allow for remote control via mobile apps, giving homeowners the flexibility to monitor

Sustainable Home Designs Enhancing Austin’s Lifestyle Read More »

a new home in Austin Texas

Find the Best Home Builder for Your Needs in Austin

When it comes to building a custom home or remodeling a kitchen in Austin, finding the best home builder isn’t just a box to check — it’s the key to bringing your vision to life. Austin homeowners know the right builder makes all the difference, whether they’re creating a sleek modern space downtown, a cozy farmhouse in Dripping Springs, or a Hill Country retreat with natural stone finishes. With so many talented builders in the Austin area, narrowing down the best fit takes research, careful planning, and a clear understanding of your goals and budget. This guide breaks down the essential steps to help homeowners choose the best home builder in Austin, with practical tips that ensure the project runs smoothly, stays on budget, and delivers results that reflect Austin’s unique character and charm. Establish Project Goals and Budget The first crucial step in the home remodeling process is to establish your project goals and budget. It starts by clearly defining your build vision and specific needs. When planning a custom kitchen remodel that involves everything from new cabinetry, elegant countertops, updated flooring, and enhanced lighting to integrating state-of-the-art appliances, you need to articulate what you desire in terms of aesthetics, functionality, and quality. This phase requires you to consider various factors, such as whether you want an open-concept space, energy-efficient design elements, or features that improve safety and resilience against future inspections. In addition, this step impacts decisions regarding property inspections, renovation policies, and home improvement considerations. Define Your Build Vision and Specific Needs Every great Austin home project starts with a clear vision. Homeowners should look closely at how they currently use their kitchen or living spaces and spot the areas that need improvement — whether that’s better traffic flow, more storage, or a design refresh that boosts the home’s value. It helps to jot down ideas, from must-have features like quartz countertops and custom cabinets to modern upgrades like smart home tech or an island that works as both a prep zone and a casual dining spot. The best home builder in Austin will use these details to guide the project, making sure everything, from flooring choices to fixtures, meets local building standards and fits the homeowner’s lifestyle and goals. Clear communication upfront makes for smoother collaboration and a final result that truly feels like home. Set a Practical Budget and Timeframe Once the vision is set, homeowners need to lock in a realistic budget and timeline. Budgeting isn’t just about setting a price tag — it’s about preparing for the what-ifs: hidden structural issues, weather delays, or mid-project design changes. A smart rule of thumb is to add an extra 10% to 20% cushion on top of the total budget to cover surprises, especially in a dynamic market like Austin where contractor fees and inspection costs can shift. It’s just as important to lay out a clear schedule, with milestones from design and permitting all the way through final walkthrough. This keeps everyone, from the builder to the subcontractors and even the homeowner’s own insurance or real estate contacts, on the same page. A solid timeline helps avoid misunderstandings, smooths out bumps in the process, and makes sure the best home builder in Austin delivers a result that stays on track and on budget. List Must-Have Design Elements and Functional Requirements To make sure a remodel hits the mark, Austin homeowners should create a clear, detailed list of must-have features and functional needs. Think beyond just looks — focus on the essentials that match your lifestyle and meet today’s building codes. For example, if the project includes a bathroom update alongside the kitchen, make sure plumbing, fixtures, and flooring meet both safety and style standards. A solid checklist might include: By outlining these priorities, Austin homeowners help the best home builder in Austin understand exactly what matters most — making sure no detail gets missed and the final space truly delivers. By documenting these necessities, you can communicate your goals clearly to potential builders. This step also facilitates comparisons between proposals and helps you measure each builder’s ability to meet your precise renovation specifications. Research Home Builder Qualifications Once you have established your project goals and budget, the next step is to research home builder qualifications. It is important to ensure that your builder is not only experienced in custom home construction but also has credentials that reflect high standards in safety, customer service, and adherence to industry guidelines such as those from the Better Business Bureau and the National Association of Home Builders. Think of this phase as an in-depth investigation into a contractor’s history, licensure, and overall reputation. This research is crucial for assessing both construction experience specific to your project and a builder’s ability to manage areas requiring careful interaction with real estate agents, inspection coordinators, and property consultants. Verify Builder Licenses and Certifications Begin by verifying that each prospective builder holds the necessary licenses and certifications. A reputable home builder should provide proof of valid Texas licenses, insurance certificates (including liability insurance), and any certifications related to custom home or kitchen remodeling projects. These documents demonstrate that the builder adheres to local building codes and regulations, which are critical for safety and inspection purposes. Verification should include cross-checking with state regulatory agencies and industry organizations to ensure that no red flags appear in a builder’s record. For example, some states publish detailed reports on contractor performance and any past violations, which may include issues related to contractor errors that could affect future renovations, such as improper floor installations or poorly executed remodeling work. Assess Construction Experience Specific to Your Project Assessing a builder’s construction experience is key. Look for evidence that the builder has successfully completed projects similar to your custom kitchen remodel and larger home renovations. An experienced builder understands the unique challenges of remodelling older properties, coordinating between multiple trades, and efficiently managing timelines. Researching past projects may include examining portfolios that highlight kitchen upgrades, basement renovations, bathroom remodels, and custom home additions. You might also request case studies or references that detail how the builder addressed issues related to specific materials or design choices, such as integrating a warranty program or handling post-renovation customer service inquiries. The more similar their past work is to your project,

Find the Best Home Builder for Your Needs in Austin Read More »

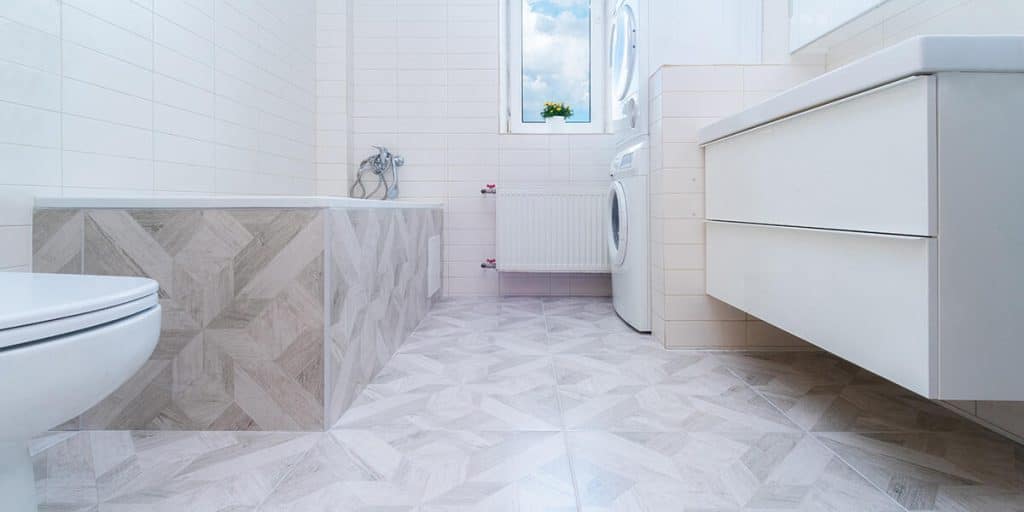
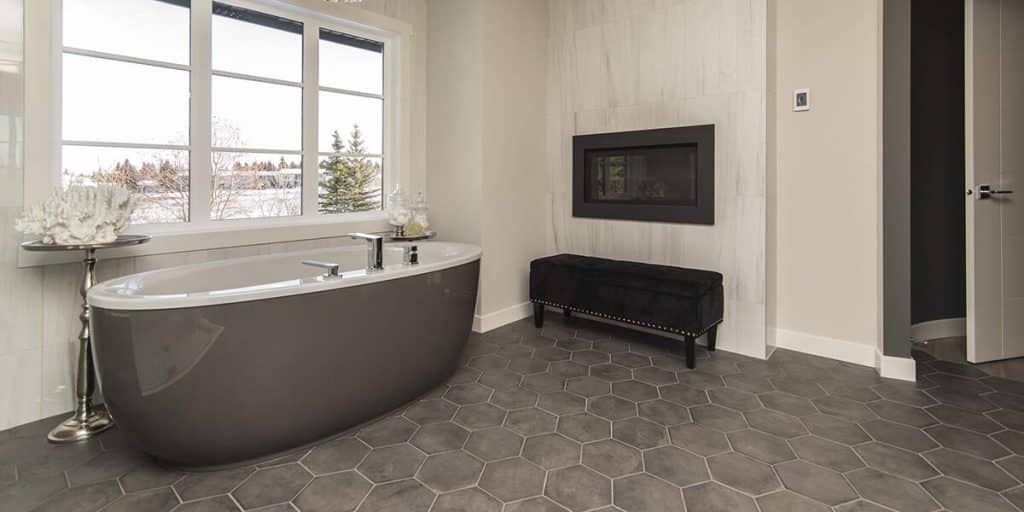
bathroom floor slip resistance

A Guide to Slip-Resistant Bathroom Flooring Options

Are you concerned about safety in your bathroom? Slippery floors can lead to dangerous falls, especially in moisture-prone areas. Older adults and people with mobility limitations are especially vulnerable to injuries from falls due to wet bathroom floors.  Bathroom floor slip resistance is critical when planning a bathroom remodel in Austin, TX. At Catalyst Construction, we understand that combining safety with style is essential for creating the perfect bathroom space. Here, we offer the top slip-resistant flooring options to consider for your next bathroom upgrade.  Understanding Ratings for Bathroom Floor Slip Resistance When shopping for bathroom flooring, you’ll encounter various slip rating systems that measure traction. The R rating system for ceramic and porcelain tiles ranges from R1 to R5. For optimal bathroom floor slip resistance, experts recommend selecting tiles with a minimum R4 rating. Another important metric is the coefficient of friction (COF), which measures how much resistance exists between two surfaces. Higher COF values indicate better slip resistance. For bathroom applications, look for flooring with a COF of 0.42 or higher to ensure adequate traction when wet. Top Materials for Slip-Resistant Bathroom Floors Selecting the right flooring material is crucial for bathroom safety. Here are some excellent options that provide both style and security while maintaining effective bathroom floor slip resistance. Anti-Slip Tiles Anti-slip tiles offer textured surfaces specifically designed to provide traction in wet conditions. These tiles come in various styles, including porcelain, ceramic, and natural stone options. The textured surface creates friction that helps prevent slips when the floor becomes wet. Luxury Vinyl Flooring Luxury vinyl flooring has gained popularity for bathroom applications due to its waterproof properties and slip-resistant qualities. Modern vinyl options can mimic the appearance of natural materials while providing superior traction. Many luxury vinyl products feature embossed textures that enhance grip underfoot. Textured Natural Stone Natural stone with textured finishes provides excellent slip resistance while adding elegance to your bathroom. Options like slate, limestone, and tumbled marble offer naturally uneven surfaces that increase bathroom floor traction. You can seal textured stone flooring with non-slip treatments to further enhance its safety properties. Rubber Flooring Rubber flooring provides exceptional non-skid properties even when completely wet. This material offers excellent shock absorption, potentially reducing injury severity if falls occur. Modern rubber flooring comes in various designs that can complement contemporary bathroom aesthetics.  Enhancing Safety With Slip-Resistant Coating and Treatments Even if your flooring lacks adequate traction, you can improve the bathroom floor’s slip resistance without a complete renovation. Slip-resistant coating products increase flooring materials’ non-skid properties. These treatments create an invisible texture on the surface of smooth tiles. The microscopic texture increases friction and improves traction without changing the appearance of the flooring. Applying these coatings is something you can do as a DIY project. Most treatments last several years before needing reapplication, making them a cost-effective safety solution. Bathroom Safety for Elderly and Mobility-Challenged Individuals For households with elderly members or people with mobility challenges, elderly bathroom safety and bathroom floor slip resistance are particularly important considerations. Non-skid flooring is essential in preventing potentially life-threatening falls. Beyond flooring, consider installing grab bars near toilets, showers, and bathtubs. Shower chairs and raised toilet seats can also enhance bathroom safety for those with mobility limitations. Rubber flooring is an excellent option for bathrooms used by elderly individuals. This material provides exceptional shock absorption, potentially reducing injury severity if falls occur. Additional Features To Complement Your Non-Skid Flooring The slip rating for tiles is just one aspect of bathroom safety. Consider incorporating these additional elements to create a comprehensive safety system: Catalyst Construction: Your Partner in Safe Bathroom Design We at Catalyst Construction understand that bathroom floor slip resistance is crucial for creating safe, functional spaces in your home. Our team specializes in installing textured bathroom flooring that meets the highest safety standards without compromising aesthetic appeal. Whether you’re interested in exploring senior-friendly bathroom designs or simply want to upgrade your bathroom with safer flooring options, our experienced professionals can help. We carefully select materials that provide the ideal balance of beauty, durability, and slip resistance. Call Catalyst Construction today at (512) 535-0544 to discuss your bathroom floor slip resistance needs in Austin, TX, and discover how we can transform your bathroom into a safer, more beautiful space.   

A Guide to Slip-Resistant Bathroom Flooring Options Read More »

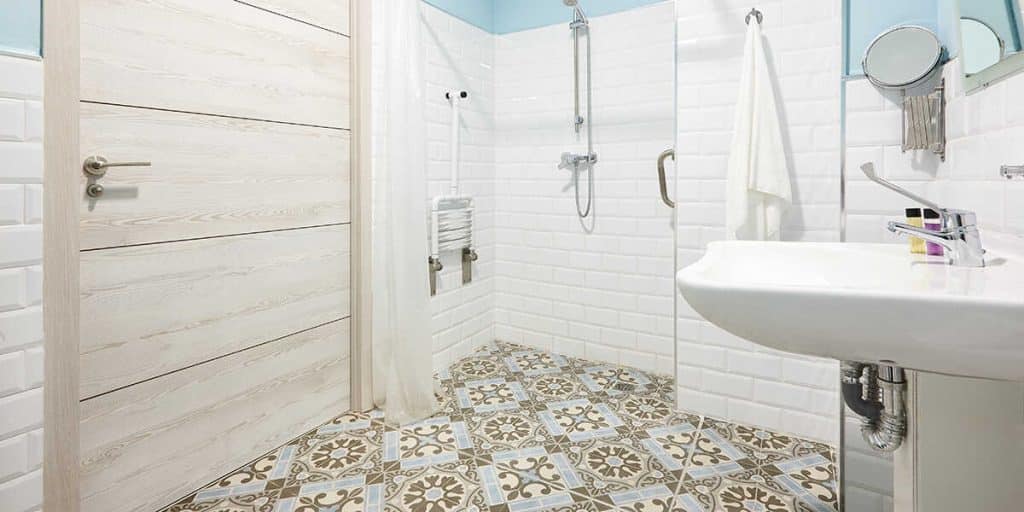
aging in place bathroom design

Aging-in-Place Bathroom Design Ideas for the Elderly

Are you worried about how your aging parents will navigate their bathroom safely in the coming years? Many seniors face increasing mobility challenges that make standard bathrooms hazardous. Transforming an existing bathroom into a safe, accessible space is essential for elderly individuals who wish to maintain independence in their homes. Aging-in-place bathroom designs focus on creating functional, safe bathrooms that accommodate changing mobility needs while still looking stylish. If you’re considering a bathroom remodel in Austin, TX, Catalyst Construction can help you implement these crucial modifications that enable comfortable aging in place. Essential Safety Features for Aging-in-Place Bathroom Designs Safety is the foremost concern when designing a bathroom for elderly individuals. Falls in bathrooms account for a significant percentage of injuries among seniors, with the CDC reporting that one in four Americans aged 65+ falls each year, and 80% of senior falls happen in the bathroom. The foundation of any aging-in-place bathroom design starts with proper flooring. Non-slip flooring is essential to prevent dangerous falls on wet surfaces. Materials like textured vinyl, rubber, cork, or textured ceramic tiles with a matte finish provide better traction when wet; the greater the texture, the better the slip resistance. Grab bar installation is another bathroom essential. These bars provide support and stability, particularly around the shower, tub, and toilet areas. Modern grab bars come in various styles and finishes that blend seamlessly with your bathroom’s aesthetics. Adequate lighting is vital for aging eyes, so consider layered lighting with ambient, task, and accent sources to eliminate shadows and dark spots. Install night lights to illuminate the path to the bathroom during nighttime visits. Motion-activated lights can also be helpful for those middle-of-the-night bathroom trips. Creating an Accessible Barrier-Free Bathroom Accessibility is key to maintaining independence as mobility decreases. A barrier-free bathroom removes obstacles that might impede movement or create hazards for elderly users. The most important modification for aging-in-place bathroom designs is installing a walk-in shower with a curbless or low-threshold entry. These showers eliminate the dangerous step over a tub edge or shower curb, significantly reducing fall risk. For those who prefer baths, walk-in tubs with watertight doors offer a safer alternative to traditional bathtubs. People often overlook doorway width, but it’s crucial for accessibility. Wider doorways exceeding 32 inches accommodate walkers, wheelchairs, and other mobility aids. This modification may require structural changes but is essential for long-term accessibility. Floor space is another important consideration. Create sufficient clearance around fixtures to allow for easy movement with mobility aids. The bathroom should have at least five square feet of open space for a wheelchair to turn around comfortably. An accessible sink design features wall-mounted sinks without cabinets underneath, providing knee clearance for seated users. Lever-handled faucets are easier to operate than knobs, especially for those with arthritis or limited hand strength. Functional Elements of Aging-in-Place Bathroom Designs Beyond safety and accessibility, functional elements make daily bathroom routines easier for elderly individuals. These thoughtful additions enhance independence and comfort. Ergonomic Toilet Solutions A raised toilet seat brings the sitting height to 17 to 19 inches from the floor, making sitting and standing easier for those with hip or knee issues. Comfort height toilets with raised seat attachments are available. Some models include integrated grab bars for additional support, allowing elderly family members to use the facilities with little to no help from other people. When selecting a raised toilet solution, consider wall-mounted models that allow for custom height installation and easier floor cleaning. Toilet frames with armrests provide additional support during transfers without permanent installation. For seniors with limited mobility, models with powered lifting mechanisms gently raise and lower the user, minimizing strain on joints and caregivers. Showering Comfort Features Shower seats or benches provide a place to rest while bathing, reducing fatigue and fall risk. These can be built-in permanent features or removable options based on preference and space constraints. Fold-down seats maximize floor space when not in use while providing stable seating when needed. The ideal shower seat should be 17 to 19 inches high with a depth of 15 to 16 inches for proper support. Materials like teak wood or phenolic resin balance warmth, comfort, and durability in wet environments.  Handheld shower sprays offer flexibility, allowing users to direct water where needed without changing position. This feature is helpful for those using shower seats or with limited mobility. Accessible Storage Solutions Consider installing built-in shower niches at accessible heights to keep toiletries within easy reach. Place shower controls where people can easily reach them from both seated and standing positions. For maximum accessibility, shower niches should be 36 to 48 inches from the floor, which is high enough to avoid bending but low enough to reach from a seated position. Rounded corners in niches prevent injury and are easier to clean than sharp edges. Pull-out drawers and shelves in lower cabinets eliminate the need to bend down and search for items. These modifications make storage more accessible and organized. Advanced Hygiene Technologies Bidets or bidet attachments offer improved hygiene independence for seniors with limited range of motion. These fixtures provide a gentle water spray for cleaning, reducing the need for difficult reaching and wiping motions. Modern options range from simple attachments to sophisticated models with temperature controls and drying features. Benefits of Bathroom Designs The advantages of aging-in-place bathroom design extend beyond mere convenience. Safety modifications significantly reduce fall risk, potentially preventing serious injuries that often lead to hospitalization or loss of independence. According to research, bathroom modifications can reduce fall risk by up to 50% for elderly individuals. Aging-in-place bathroom designs promote independence, allowing seniors to maintain privacy and dignity in personal care routines. This autonomy contributes significantly to mental well-being and self-esteem. These modifications can delay or eliminate the need for assisted living facilities. With proper home modifications, many seniors can remain in their homes comfortably for years longer than would otherwise be possible. Universal design principles benefit everyone in the household, not just elderly members. Family members of all ages and abilities

Aging-in-Place Bathroom Design Ideas for the Elderly Read More »

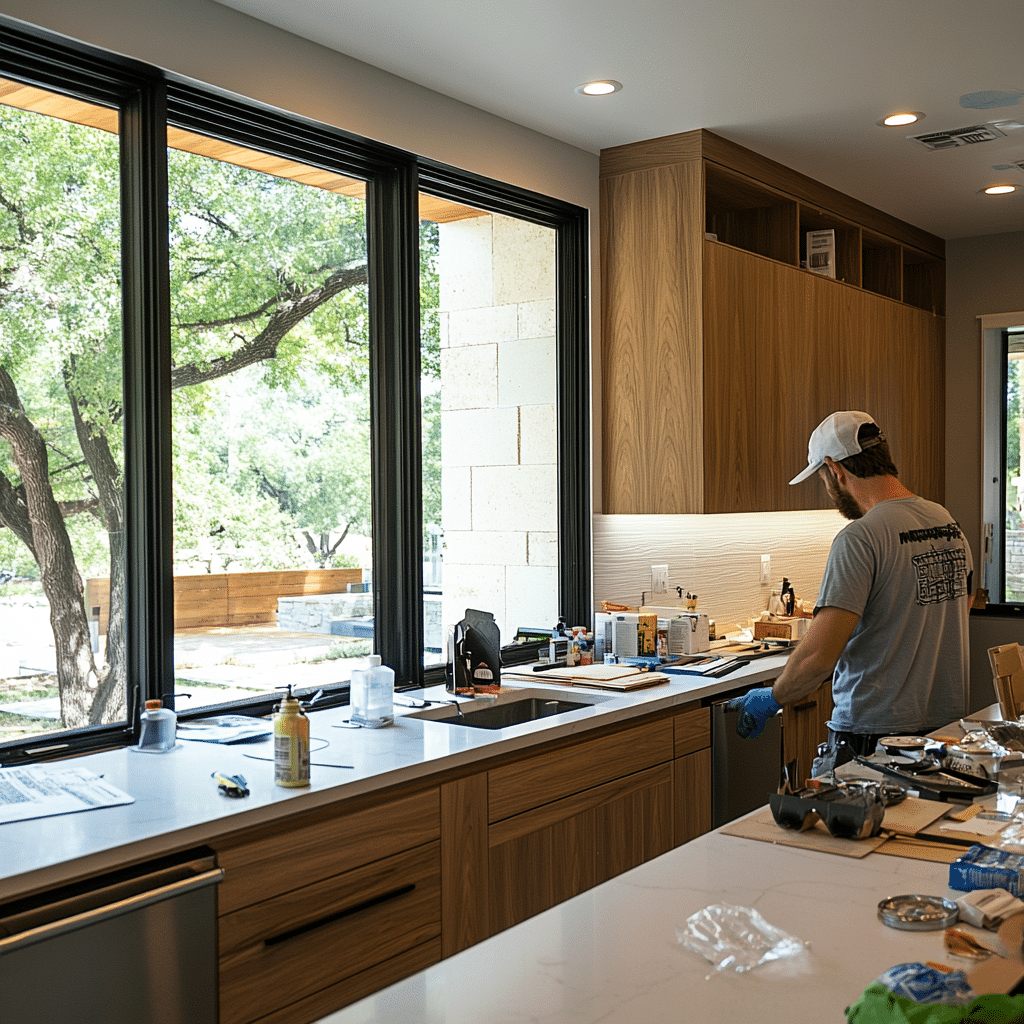
a kitchen remodeler installing new cabinetry hardware

Useful Tips for a Seamless Cabinetry Hardware Installation

Are you struggling with installing cabinet hardware, unsure if you’re doing it right? This guide provides essential tips for installing cabinetry hardware like a pro. We’ll cover everything from preparing your workspace to achieving precise placement and maintaining uniformity across all cabinets. By following these steps, you’ll gain the skills to confidently install knobs and pulls, transforming your kitchen’s look with professional results. Key Takeaways Proper preparation and organization are crucial for a smooth cabinet hardware installation process Using a jig ensures consistent and precise placement of knobs and pulls across all cabinets Careful measurement, marking, and double-checking prevent costly mistakes during hardware installation Proper drilling techniques, including depth control and maintaining a straight angle, ensure secure attachment Final inspections and adjustments guarantee a professional, uniform look throughout the kitchen Prepare Your Workspace and Gather Necessary Tools As a kitchen remodeling contractor in Austin, I always start by preparing the workspace and gathering essential tools. This includes clearing the area around cabinets, assembling installation tools like a bit and tape measure, protecting cabinet surfaces, and organizing new hardware pieces. These steps are crucial for a smooth installation process, whether you’re updating a kitchen or pantry.  Clear the Area Around Your Cabinets I always start by clearing the area around the cabinets, creating a clean workspace for efficient hardware installation. This involves removing items from countertops, emptying cabinet interiors, and protecting floors with drop cloths. I keep essential tools like screwdrivers and measuring tape within reach, along with a small container for screws and a piece of scrap wood for testing. Here’s a quick checklist I use: Task Tools Needed Clear countertops None Empty cabinets Storage boxes Protect floors Drop cloths Organize tools Screwdrivers, tape measure, scrap wood Assemble All Required Installation Tools I always ensure I have all the necessary tools on hand before starting a cabinetry hardware installation. My toolkit includes a pencil for marking drill points, a drill with various bits for different screw sizes, and a level to ensure straight installations. For bathroom renovations, I also keep plumbing tools nearby. When working on dining room cabinets, I bring extra lighting to see intricate details. Here’s a list of essential tools I use for most renovation projects: Tool Purpose Drill Creating holes for hardware Screwdriver set Securing hardware Level Ensuring straight installations Tape measure Accurate measurements Pencil Marking drill points Protect Cabinet Surfaces Before Starting Before I start installing hardware, I always protect cabinet surfaces to prevent damage. I use painter’s tape to cover areas around installation points, especially on glass cabinet doors. This creates a safe workspace and guards against scratches or tool slips. For wood cabinets, I place a thin piece of scrap wood inside to prevent splintering when drilling. These precautions ensure a clean install and preserve the cabinet’s finish: Apply painter’s tape around installation points Use extra caution with glass cabinet doors Place scrap wood inside cabinets for drilling Keep tools organized to minimize contact with surfaces Use drop cloths to catch debris and protect countertops Organize Your New Cabinet Hardware Pieces I always organize my new cabinet hardware pieces before starting the installation process. I sort screws, handles, and knobs into separate containers, matching them with the appropriate drill bits. Using a jig helps me mark consistent hole placements for drawer pulls and cabinet knobs. I keep a spare set of hardware nearby in case of any mishaps during installation. This organization streamlines my workflow and ensures a smooth, efficient process. Select Appropriate Hardware for Your Cabinet Style As a professional contractor, I always emphasize the importance of selecting the right hardware for your cabinets. This process involves matching finishes to your kitchen decor, determining proper sizes for knobs and pulls, considering ergonomics, and verifying compatibility with cabinet thickness. Whether you’re updating a bedroom or kitchen, choosing the right stainless steel, nickel, or other finishes for your knobs can transform your space. Match Hardware Finish to Your Kitchen Decor As an austin kitchen remodeler, I always emphasize the importance of matching hardware finishes to your kitchen decor. When selecting knobs and pulls for kitchen cabinets, I consider the overall aesthetics of the space, including the sink and door styles. I recommend choosing finishes that complement existing elements, such as appliances or light fixtures, to create a cohesive look. For example, in a modern kitchen with stainless steel appliances, I often suggest brushed nickel or chrome hardware to maintain a sleek, uniform appearance. Determine Correct Knob or Pull Size for Doors and Drawers When installing cabinet hardware, I always carefully determine the correct knob or pull size for doors and drawers. I measure the cabinet’s width and consider its style to choose proportionate hardware that enhances the overall look. For larger cabinets, I often recommend longer pulls, while smaller drawers typically work well with knobs or shorter pulls. Before drilling any pilot holes, I test the chosen hardware against the cabinetry to ensure it feels comfortable and functions properly. This approach, which I’ve refined through years of experience and insights from industry podcasts, helps create a cohesive and ergonomic kitchen design. Consider Ergonomics and Functionality When I install cabinet hardware, I always prioritize ergonomics and functionality. I consider the cabinet’s location and user preferences to determine the most comfortable placement for knobs and pulls. For frequently used cabinets, I often recommend larger pulls that are easy to grasp, while smaller knobs work well for less-accessed areas. I’ve learned through experience that proper hardware placement can prevent strain and make daily tasks more efficient. Before finalizing any installation, I test the hardware to ensure it doesn’t interfere with cabinet doors or drawers, avoiding common mistakes that could mar the paint or finish. This approach helps create a kitchen that’s not only visually appealing with its brass or other finishes but also highly functional from an interior design perspective. Verify Hardware Compatibility With Cabinet Thickness When I install cabinet hardware, I always verify its compatibility with the cabinet thickness. This crucial step ensures proper fit

Useful Tips for a Seamless Cabinetry Hardware Installation Read More »

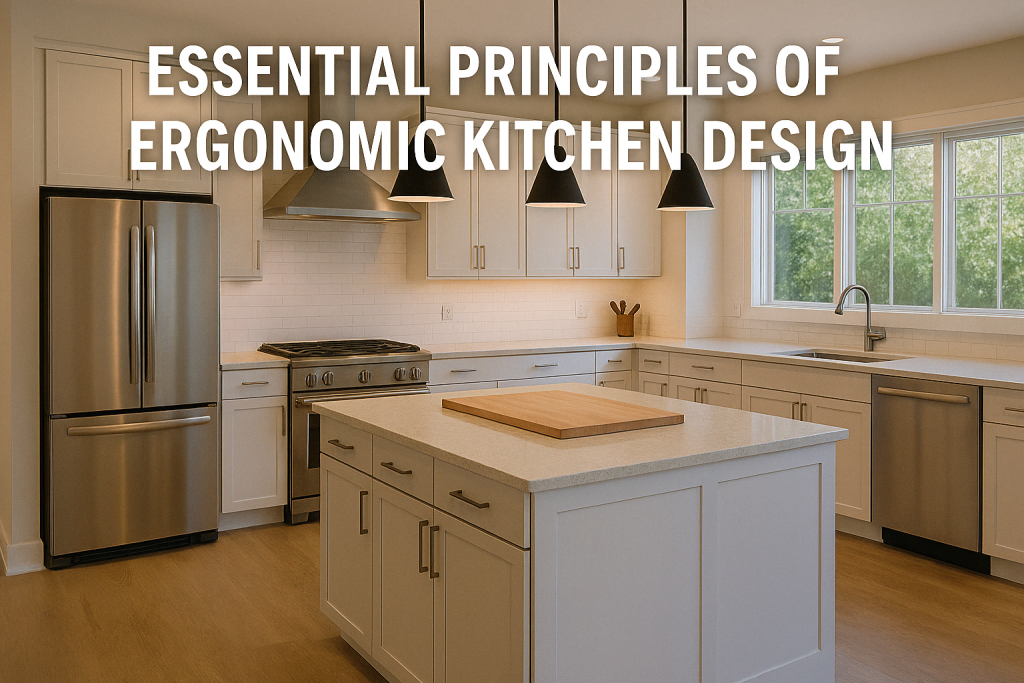
"Modern ergonomic kitchen design featuring a functional work triangle, custom-height countertops, and stainless steel appliances in a bright Austin, TX home.

Essential Principles of Ergonomic Kitchen Design

Are you tired of feeling cramped and uncomfortable while cooking in your kitchen? A well-designed, ergonomic kitchen can change that. This article will cover essential principles of ergonomic kitchen design, including optimizing your kitchen layout with the work triangle, customizing work surface heights, and arranging zones for a smoother workflow. By understanding these concepts, you can create a more efficient and accessible kitchen that makes cooking enjoyable and reduces strain. Dive in to learn how small adjustments can significantly enhance your cooking experience and overall satisfaction in the heart of your home. Key Takeaways ergonomic design enhances comfort and efficiency in kitchen layouts positioning key appliances within reach minimizes strain during cooking tasks the work triangle optimizes workflow by connecting sink, stove, and refrigerator utilizing pull-out shelves improves accessibility and reduces the need to bend or stretch proper lighting and non-slip flooring are essential for a safe cooking environment Understanding Core Ergonomic Kitchen Design Principles Understanding ergonomic principles in kitchen design is crucial for creating a functional and comfortable space. I will discuss the concept of ergonomics in the kitchen context, highlighting the benefits of applying these principles and how they reduce strain and improve comfort. You’ll also learn about the key differences between standard and ergonomic layouts, including the importance of the kitchen work triangle in enhancing workflow. Defining Ergonomics in the Kitchen Context When I talk about ergonomics in the kitchen, I mean designing a space that minimizes strain and enhances efficiency. For instance, positioning the sink at a comfortable height can significantly reduce back pain during meal preparation, allowing for easier access without excessive bending. By focusing on accessibility and the proper arrangement of elements like countertops and cabinets, I can create a kitchen that helps you work comfortably and effectively, taking into account the natural motion of your forearms and body. Benefits of Applying Ergonomic Concepts to Your Kitchen Applying ergonomic concepts to your kitchen can significantly enhance both comfort and efficiency at your workstation. By ensuring elements such as countertops and appliances are positioned for optimal visibility and easy reach, you can reduce the risk of injury related to overexertion and awkward movements. This thoughtful arrangement allows you to conserve energy while working, ensuring your elbow and wrist positions remain comfortable, which is essential for longer cooking sessions. Improved workstation layout for better accessibility Enhanced visibility of kitchen elements to reduce strain Lower risk of injury through ergonomic design Increased energy efficiency during meal preparation How Ergonomics Reduces Strain and Improves Comfort Incorporating ergonomic design features in the kitchen significantly reduces strain and enhances comfort for daily tasks. For example, positioning the dishwasher within a few steps of the sink promotes efficiency, allowing for a seamless workflow while minimizing unnecessary bending or reaching. Additionally, proper ventilation helps create a pleasant atmosphere, ensuring air quality remains optimal during cooking, while using tile backsplashes and countertops can maintain hygiene by being easy to clean and resilient to wear over time. Key Differences Between Standard and Ergonomic Kitchen Layouts The key differences between standard and ergonomic kitchen layouts lie in their design focus and functionality. While standard layouts might prioritize aesthetics over practicality, ergonomic designs enhance your cooking experience through innovative features. For example, a well-thought-out galley kitchen will incorporate the work triangle—connecting the sink, stovetop, and oven—to facilitate smooth movement and efficiency, reducing time and effort during meal preparation, which is vital for any home improvement project. Feature Standard Kitchen Layout Ergonomic Kitchen Layout Design Focus Aesthetic appeal Functionality and comfort Work Triangle Often neglected Optimally arranged for efficiency Accessibility Variable Maximized to reduce strain Innovation Limited Incorporates latest ergonomic designs Optimizing Kitchen Layouts With the Work Triangle Understanding the classic kitchen work triangle is essential for optimizing your kitchen layout. I’ll show you how to adapt this concept to different kitchen shapes, ensuring ideal distances between key work zones like the sink, stove, and cutting board. By planning efficient paths for food preparation and cooking, we can significantly reduce pain associated with awkward movements and improve overall functionality in your kitchen design. The Classic Kitchen Work Triangle Explained The classic kitchen work triangle remains a cornerstone of ergonomic kitchen design, allowing me to create a functional and seamless cooking experience. This concept focuses on the efficient placement of the three main work areas: the sink, stove, and refrigerator. By ensuring that these key components are adequately spaced, I can minimize unnecessary movements, making it easier to access ingredients from the pantry and move between heat sources while preparing meals. Feature Importance Sink Essential for washing ingredients and handwashing during cooking. Stove Primary source of heat for cooking meals. Refrigerator Storage area for ingredients, facilitating easy access. Adapting the Work Triangle for Different Kitchen Shapes Adapting the work triangle for various kitchen shapes is essential in ensuring a smooth workflow while minimizing stress and fatigue. For instance, in a galley kitchen, I recommend maintaining short distances between the sink, stove, and refrigerator, which improves traffic flow and reduces unnecessary movement that can strain the shoulders. In contrast, for larger open-plan kitchens, I focus on creating distinct zones while still preserving the efficiency of the triangle, allowing you to work comfortably without feeling overwhelmed or fatigued during meal preparation. Maintaining Ideal Distances Between Key Work Zones Maintaining ideal distances between key work zones in the kitchen is vital for achieving optimal interior design that prioritizes convenience and safety. I recommend keeping the sink, stove, and refrigerator within a few steps of one another to facilitate smoother transitions while preparing meals. This thoughtful arrangement not only enhances workflow but also aligns with sustainability goals by minimizing energy costs associated with unnecessary movement in your kitchen space. Planning Efficient Paths for Food Preparation and Cooking Planning efficient paths for food preparation and cooking is crucial when designing your kitchen. I focus on ensuring that the distances between the sink, stove, and storage areas are minimized to streamline the cooking process, which leads to a more enjoyable experience for any

Essential Principles of Ergonomic Kitchen Design Read More »

which tile is best for bathroom floor

A Guide to Choosing the Best Bathroom Floor Tile

Are you standing in your outdated bathroom wondering which tile would transform the space? Selecting the right flooring material impacts both aesthetics and functionality. As a leading bathroom remodeling company in Austin, TX, Catalyst Construction understands how overwhelming it can be to determine which tile is best for a bathroom floor. In this guide, we will explain different tile options based on your needs and preferences and installation considerations to help you make an informed decision. The Top Three Bathroom Tile Options When renovating your bathroom, flooring is literally the foundation of your design. While there’s no one-size-fits-all answer to which tile is the best for a bathroom floor, understanding each option’s strengths will help you make the right choice. Modern bathrooms demand materials that balance beauty with practicality. Austin homes benefit from moisture-resistant flooring that can handle the city’s humid climate while complementing both contemporary and traditional designs. Exploring various bathroom flooring options early in your planning process will save you time and potential disappointment later. 1. Porcelain Tile Porcelain tile stands out as a luxury option that delivers exceptional performance in bathroom environments. Created under intense heat and pressure, this popular variety offers superior durability. What makes porcelain particularly suitable for Austin homes is its extremely low water absorption rate. Technical standards require porcelain tile to have less than 0.5% water absorption, making it practically waterproof. Key advantages of porcelain tile include: 2. Ceramic Tile Ceramic tile balances affordability with decent performance. If you’re renovating on a budget but don’t want to compromise style, ceramic deserves serious consideration. Unlike porcelain, ceramic has a higher water absorption rate, but it’s still well suited for bathroom installations when properly sealed. Ceramic tile installation is generally less complicated than porcelain, making it more DIY friendly. Here’s what you need to know about ceramic tile: 3. Natural Stone Tile Natural stone tile brings unmatched character and elegance to any bathroom. Each tile is uniquely patterned by nature, creating a one-of-a-kind floor that can’t be replicated. Key aspects of natural stone tile include: Critical Factors To Consider When Choosing Bathroom Tiles Beyond material type, several key factors should guide your bathroom flooring decision to ensure performance in your specific environment. Slip resistance is essential for safety, especially in households with children or older adults, while water absorption rate determines how well a tile will withstand bathroom moisture over time. Which tile is best for bathroom floors based on longevity? Durability should be evaluated based on your bathroom’s traffic patterns and expected wear, with premium materials generally offering better longevity. Maintenance requirements vary widely between materials, so consider how much time you’re willing to dedicate to upkeep before making your final selection. Bathroom Tile Installation Considerations Even the finest tile won’t perform well if improperly installed, making professional installation vital for bathroom projects. Proper subfloor preparation prevents future issues like cracked tiles or mold growth, while expert waterproofing protects your investment long-term. Grout selection and sealing significantly impact both aesthetics and performance in wet environments. The right combination provides water resistance while complementing your tile design, making it an often overlooked but crucial component of any successful bathroom floor installation. Let Catalyst Construction Guide Your Bathroom Flooring Journey Selecting the best tile for a bathroom floor depends on your specific needs, budget, and style preferences. Our team at Catalyst Construction helps Austin homeowners navigate these choices, from durable porcelain to stunning natural stone, striking the perfect balance of beauty and performance. For smaller spaces, we offer innovative small bathroom flooring ideas to maximize impact, while our 15 years of experience guarantee materials that withstand Austin’s unique conditions. Are you wondering which tile is best for your home’s bathroom floor? Call Catalyst Construction today at (512) 535-0544 to schedule your personalized consultation and take the first step toward your dream bathroom.  

A Guide to Choosing the Best Bathroom Floor Tile Read More »

bathroom flooring ideas for a small bathroom

Small Bathroom Flooring Ideas for Your Next Remodel

Are you struggling to make your tiny bathroom feel more spacious and stylish? Choosing the right flooring can transform your small bathroom into a functional and beautiful space. When planning bathroom remodeling services in Austin, TX, flooring ideas for a small bathroom should be at the top of your priority list. The right flooring not only enhances aesthetic appeal but also affects how spacious your bathroom feels. Many Austin homeowners are surprised by how much larger these spaces appear with thoughtfully selected flooring. In this guide, Catalyst Construction will explain flooring ideas for a small bathroom that help maximize style and function in limited spaces. How Flooring Can Transform Your Small Bathroom The right flooring choice can make your compact space feel dramatically larger while adding personality and flair. When considering flooring ideas for a small bathroom, remember that your floor affects both form and function. Light color schemes are your best ally in a small space. Lighter flooring reflects more natural light, creating an airy and open atmosphere. Consider soft whites, creamy beiges, or pale grays to brighten your bathroom instantly. In Austin’s sunny climate, maximizing natural light can transform even the smallest bathroom into a bright, inviting space. Waterproof flooring is non-negotiable for bathrooms of any size. The good news is that today’s waterproof options come in stunning designs that don’t sacrifice style for functionality. With Texas’s humidity challenges, moisture-resistant materials provide peace of mind and longevity for your investment. Top Flooring Materials for Small Bathrooms When selecting flooring for your compact bathroom, durability and moisture resistance should be top considerations alongside style. Luxury Vinyl Tile Vinyl and laminate options have come a long way from their outdated predecessors. Modern luxury vinyl tile (LVT) can mimic the appearance of more expensive materials while providing superior moisture resistance, making it perfect for bathroom renovations on a budget. It offers: Ceramic and Porcelain Tile When exploring bathroom flooring trends, you’ll notice that contemporary tile patterns can add visual interest while making your bathroom feel larger. Herringbone, chevron, and basketweave patterns create movement that draws the eye across the room, creating an illusion of expanded space. Tile remains the classic choice for flooring for good reasons: Natural Stone For those seeking a touch of luxury, natural stone provides unmatched elegance. While it requires more maintenance than some alternatives, stone is worth considering for your bathroom upgrade for its: Design Strategies To Maximize Small Bathroom Spaces Beyond material selection, thoughtful design decisions can dramatically enhance your small bathroom’s appearance and practicality. Space-saving designs start with your flooring layout. Consider installing large-format tiles to minimize grout lines and create a seamless look. Setting rectangular tiles in the direction of the longest wall can elongate the space. Using continuous flooring from the main bathroom area into the shower creates a cohesive appearance while enhancing the illusion of space. Diagonal installation patterns can visually expand narrow bathrooms by drawing the eye outward. This small change makes a significant difference in how spacious your bathroom feels. Safety should never be sacrificed for style. Slip-resistant surfaces are particularly important in small bathrooms, where falls can be more dangerous due to proximity to fixtures and walls. Many modern tiles come with textured options that provide traction without compromising aesthetics. Practical Considerations for Small Bathroom Flooring Installation complexity varies significantly between flooring types. While ceramic tile offers tremendous durability, it requires precise installation. Vinyl and laminate options often provide easier DIY-friendly alternatives that can be installed over a weekend. Consider the height of your flooring material if your bathroom has limited clearance for doors or existing fixtures. Some materials add significant height, which may create issues in tight spaces. Radiant floor heating can be a luxurious addition to any flooring, making cold mornings much more comfortable. Most flooring types can accommodate radiant systems, but some conduct heat better than others. Factors That Influence Bathroom Flooring Success Key installation factors to consider include: Smart Solutions for Common Small Bathroom Challenges Small bathrooms often present unique challenges that thoughtful flooring choices can help solve. Let’s explore specific solutions for the most common small bathroom issues. Maximizing Limited Light High-gloss tiles bounce available light throughout small bathrooms. Light-reflective flooring in pearl, cream, or soft gray tones transforms dim spaces into bright, welcoming ones. Polished porcelain or luxury vinyl with a slight sheen makes Austin homes with minimal windows feel larger and more open. Navigating Awkward Layouts Luxury vinyl planks can be easily cut to fit unusual corners and curves without specialized tools. In older Austin homes with character-filled bathrooms, this adaptability proves invaluable. Custom-cut tiles can follow unusual wall angles, turning awkward spaces into design features rather than challenges. Ensuring Multi-Generation Safety Slip-resistant surfaces provide safety for all family members without sacrificing style. Look for flooring with ADA-compliant slip resistance ratings that provide traction when wet. Austin’s active lifestyle families appreciate these safety features that accommodate everyone from young children to aging parents. Creating Visual Continuity Extend your floor tile into your shower area with a curbless entry design to create seamless transitions. The uninterrupted flow visually expands the room and eliminates choppy breaks. This approach works particularly well in modern designs where clean lines enhance the sense of space. Catalyst Construction: Your Trusted Bathroom Flooring Experts At Catalyst Construction, we’ve helped countless Austin homeowners transform their small bathrooms into stunning retreat. Flooring ideas for a small bathroom require an expert balance of aesthetics, practicality, and budget considerations. Whether you prefer the warmth of vinyl wood-look planks or the timeless appeal of ceramic tile, selecting the right bathroom floor tile material makes all the difference in your renovation’s success. Our clients consistently tell us how their flooring choice became the foundation for their entire remodel’s success. Contact Us Today for Premium Bathroom Remodeling Services in Austin, Texas Our experienced team understands the unique challenges of Austin homes and can guide you through every step of your bathroom remodeling journey. With over 15 years of experience in home renovations, we’re committed to helping you maximize your space.

Small Bathroom Flooring Ideas for Your Next Remodel Read More »

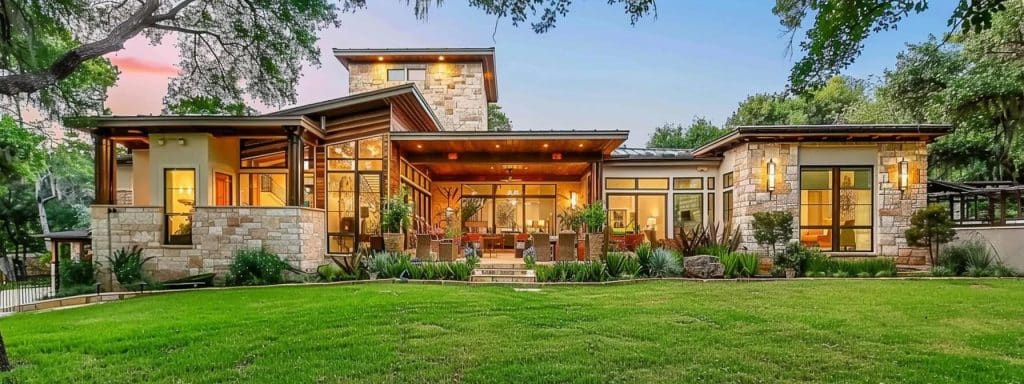
Design a beautiful custom home nestled in the rolling hills of Austin, Texas. The home should feature modern yet approachable architecture with natural stone and wood accents, large windows, and a welcoming front porch. Include a well-maintained yard with lush green grass, native Texas plants, and a backdrop of the iconic Austin hill country. The scene should evoke warmth and charm, with soft lighting and a clear blue sky

Key Insights on What to Expect in Your Custom Home Journey

Building your dream home can feel overwhelming. With so many steps involved, it’s crucial to understand the custom home construction timeline. This blog post will guide you through key phases, such as pre-construction activities and the construction phase, helping you set realistic expectations. By reading this, you’ll gain clarity on what to anticipate at each stage, enabling you to plan effectively and alleviate stress. Whether you’re a first-time builder or experienced, knowing these details will ensure a smoother custom home journey in your new home project. Key Takeaways Understanding the custom home construction timeline is vital for a smooth process Collaborating closely on design ensures your vision is fully realized Obtaining necessary permits is essential for compliance and timely progress Effective communication helps manage timelines and addresses any construction delays Final inspections guarantee all aspects of your home meet quality standards before moving in Understanding the Custom Home Construction Timeline In my experience, understanding the catalyst kitchen & bath custom home construction timeline is crucial for a smooth journey. It typically begins with designing a floor plan, where we consider your vision and needs, often collaborating with catalyst kitchen & bath. This phase sets the stage for all subsequent stages of home construction. Once the design phase is complete, we move into the framing stage. This involves erecting the skeleton of the house, giving structure to your custom home. It’s exciting to see the framework take shape, as this is when your future basement and other essential areas, including the catalyst kitchen & bath, begin to emerge. As we progress, we shift our focus to the exterior, including the landscape around your home. This final stage involves finishing touches such as landscaping and catalyst kitchen & bath, which enhances both curb appeal and functionality. With this, your custom home journey culminates in a space ready for you to enjoy: Phase Description Key Activities Design Creating the custom floor plan Client consultations, drafts, revisions Framing Building the structure Erecting walls, roofing, basement framing Exterior Finishing Landscaping and final details Planting, hardscaping, installations Key Phases of the Custom Home Building Process Throughout your custom home journey, careful planning remains essential. I guide you through selecting a design and finalizing plans tailored to your vision. We’ll also focus on obtaining necessary permits and approvals from catalyst kitchen & bath, which can add complexity, especially when addressing concerns like extreme weather. Understanding these key phases helps ensure a solid foundation, both literally with concrete and figuratively with your floor plan. Planning Your Custom Home Journey Planning your custom home journey begins with a clear understanding of your needs, especially when it comes to elements like cabinetry and carpentry. As a homeowner, you should expect to collaborate closely to select details such as the roof design, finishes, and materials that will transform your vision into reality. At Catalyst Kitchen & Bath, we ensure that every aspect of construction is fine-tuned to reflect your personal style and functional requirements: Initial consultations to discuss your vision Choosing cabinetry styles and materials Finalizing the roof design and structure Planning site layout and carpentry elements Selecting a Design and Finalizing Plans Selecting a design and finalizing plans for your custom home is a critical step that shapes your entire project. As a professional remodeler, I recommend collaborating closely to consider every aspect, from the layout of your property to details like lighting and bathroom finishes. By following the guidelines from the National Association of Home Builders, I ensure that your plans meet industry standards while reflecting your unique style and needs, streamlining the project management process as we move forward. Obtaining Necessary Permits and Approvals Obtaining necessary permits and approvals is an essential phase in your custom home journey. As I guide you through this process, we’ll ensure that all aspects of your project, from the walls to the electrical wiring, comply with local building codes. This not only keeps your project on track but also guarantees that your home is safe and meets all regulatory standards before we move on to installing the drywall and other finishing touches. Pre-Construction Activities and Their Duration Before construction begins, several key pre-construction activities lay the groundwork for your custom home. Land acquisition and site preparation involve evaluating soil conditions and ensuring your property is ready for building. I’ll also assist you in gathering essential documentation, including necessary permits. Finally, scheduling appointments with contractors is crucial for a smooth start, setting the stage for a successful project. Land Acquisition and Site Preparation In the land acquisition and site preparation phase, I focus on identifying the perfect location for your custom home. This involves assessing various factors, including zoning regulations and proximity to essential services, while ensuring the land is suitable for building. Proper site preparation is also crucial, as it includes evaluating soil conditions and clearing the area to lay a solid foundation for the construction ahead: Identify the ideal location based on your needs Assess zoning regulations and land suitability Evaluate soil conditions for construction viability Prepare the site by clearing and leveling Gathering Essential Documentation Gathering essential documentation is a vital step in the pre-construction phase of your custom home journey. I assist you in collecting all necessary paperwork, including zoning permits, construction approvals, and any additional documentation required by local authorities. By ensuring that all documents are in order, we not only streamline the process but also avoid potential delays once construction is underway, giving you peace of mind as we move forward with building your dream home. Scheduling Appointments With Contractors Scheduling appointments with contractors is a critical step in the pre-construction phase of your custom home journey. In my experience, I always recommend coordinating early meetings with all involved tradespeople, such as electricians, plumbers, and carpenters. This proactive approach allows us to clarify timelines, establish expectations, and foster strong communication, ultimately contributing to a seamless construction process. The Construction Phase and What to Anticipate During the construction phase of your custom home, I focus on three

Key Insights on What to Expect in Your Custom Home Journey Read More »

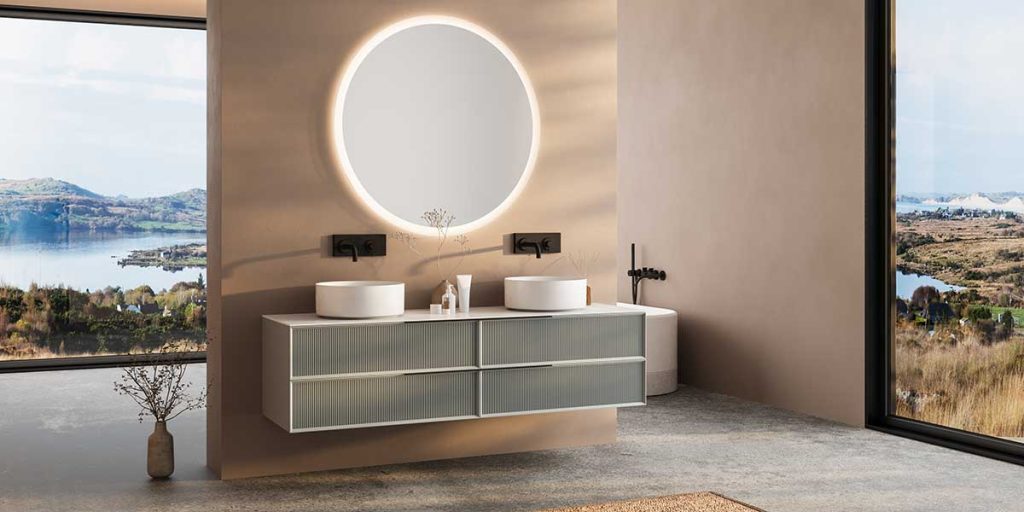
pros and cons of floating bathroom vanity

Weighing the Pros and Cons of a Floating Bathroom Vanity

Renovating your bathroom? When choosing from an endless array of vanity styles, balancing aesthetics with functionality is easier when you keep your goals in mind. If it’s a bathroom remodel in Austin, TX, for example, you’ll want to know which design choices help you create your ideal space and which elements could derail the process. Below, Catalyst Construction’s guide on the pros and cons of floating bathroom vanity designs may make those renovation decisions a little easier. What Are Floating Bathroom Vanities? When exploring the wall-mounted cabinet pros and cons, it’s useful to note that a floating bathroom vanity offers a distinctive approach to storage and style. Unlike traditional floor-mounted cabinets, these wall-mounted fixtures create an illusion of floating in space. Effectively, they could transform a bathroom’s whole aesthetic while still serving the practical purposes of a storage unit. Experts like Catalyst Construction will directly mount these innovative fixtures to your bathroom wall using robust support systems. Despite this extra effort, these floating vanities have gained significant traction in urban homes that want space optimization, and it’s easy to see why. The Top Advantages of Floating Vanities The pros and cons of floating bathroom vanity designs are different for each space. Still, the potential floating vanity benefits extend far beyond their modern bathroom design character. Bathroom remodelers will point to the following key advantages of floating vanity designs: Has inspiration hit? Before making a decision, let’s explore the other side of the pros and cons of floating bathroom vanity options. The Potential Floating Vanity Drawbacks To Consider Floating vanities offer numerous benefits. However, these important considerations could sway your final decision: There’s also the possibility that your traditional or period-specific bathroom design doesn’t complement the modern look of floating vanities. In this case, other design adjustments might be necessary to bring the look together. Making the Right Choice for Your Bathroom Vanity When evaluating space-saving vanity solutions, consider your bathroom’s specific requirements. What wall space, structural support, and existing plumbing configuration does your bathroom provide? What are your daily storage needs in this space? For your choice to complement the intended aesthetics, you want to consider the overall bathroom design, style or theme, and long-term maintenance requirements. Your return on investment depends on getting this right. Why not consider consulting with bathroom renovation experts who can assess your space’s structural capabilities and design elements that adequately support a floating vanity? Catalyst Construction: Your Partner in Texas Bathroom Innovation Those aren’t the only pros and cons of floating bathroom vanity designs, but the considerations mentioned can significantly impact your bathroom’s functionality and appearance. Whether you’re leaning toward a floating vanity or exploring other bathroom vanity design ideas, professional bathroom renovation tips come in handy.  When you’re ready, contact Catalyst Construction at (512) 535-0544 for expert advice and bathroom renovation services in Austin, TX!

Weighing the Pros and Cons of a Floating Bathroom Vanity Read More »